Please wait

This is taking a little longer than expected

text.skipToContent text.skipToNavigation
You have exceeded the number of times to successfully log in to your myUFA account. For your security, access to your myUFA account is locked. In order to access your myUFA account, please contact Customer Support 1-877-258-4500.

Tips from the Field

Tips from the Field

It All Starts With the Tank Mix

Two primary considerations when tank mixing herbicides — mix all ingredients in the proper order, and make sure you are combining products that are compatible when applied to the target weeds in crop.

  1. Follow the simple W.A.L.E.S. method to make sure all components of the mix are added in this recommended order:

    • W - Wetable powders (all dry ingredients) are added first to sprayer tank water
    • A - Agitate thoroughly to ensure proper mixing
    • L - Liquid flowables and suspensions are next
    • E - Emulsifiers and concentrate formulations
    • S - Surfactant solutions are added las
  2. Make sure all active ingredients included in the tank mix are compatible. Each herbicide triggers a metabolic reaction inside the plant and depending on the chemistry, they can trigger mixed signals which are actually antagonistic, reducing the effectiveness of weed control measures and may even be harmful to the crop. Always read product labels for details on tank mixing directions.


Herbicide Layering

Herbicide layering involves using two or four herbicides, with different modes of action in sequence during a growing season. The strategy delivers a one-two punch for better control, especially of problem weeds that may not be as susceptible to a single herbicide application. Wild oats and cleavers are examples of tough-to-control weeds.

A tank mix scenario or other program that might include a faster acting contact herbicide with a residual product is a good approach. The first product weakens the weed, while the second follows up with effective control.

Developing a good herbicide rotation over subsequent seasons is important to reduce the risk of selecting weeds that show herbicide tolerance. But the now commonly-recommended layering approach, with multiple modes of action in the same weed control season, and then rotating chemistries through the crop rotation, can be even more effective in the battle against herbicide resistance.

  • Start with a proper pre-seeding burndown to control the first weed flush and reduce weed numbers.
  • Follow that up with a tank mix or combination of at least three to four different products (the more the better) with different modes of action and residual activity for effective control.
  • It's an effective strategy for catching herbicide resistant weeds you may not be aware of, and/or preventing the resistant ones from getting a start.

Weather Consideration

Just about every herbicide label carries the recommendation to apply products "when weeds are actively growing." While there may be some variations, in general, if it is nice warm day and the sun is shining, the weeds are actively growing.

Cool overcast conditions aren't conducive for plant growth, including weeds. So at cool or even very hot temperatures weed control can be compromised. An ideal temperature range on a sunny day sits between 16 and 24°C . Weeds may be killed slowly below 15°C. Some herbicides may injure crops if applied above 29°C. Avoid applying volatile herbicides such as 2,4-D ester, MCPA ester and dicamba during hot weather, especially near susceptible broadleaf crops, shelterbelts, or farmsteads.

For more specific recommendations consult product labels.

Preparing For Harvest

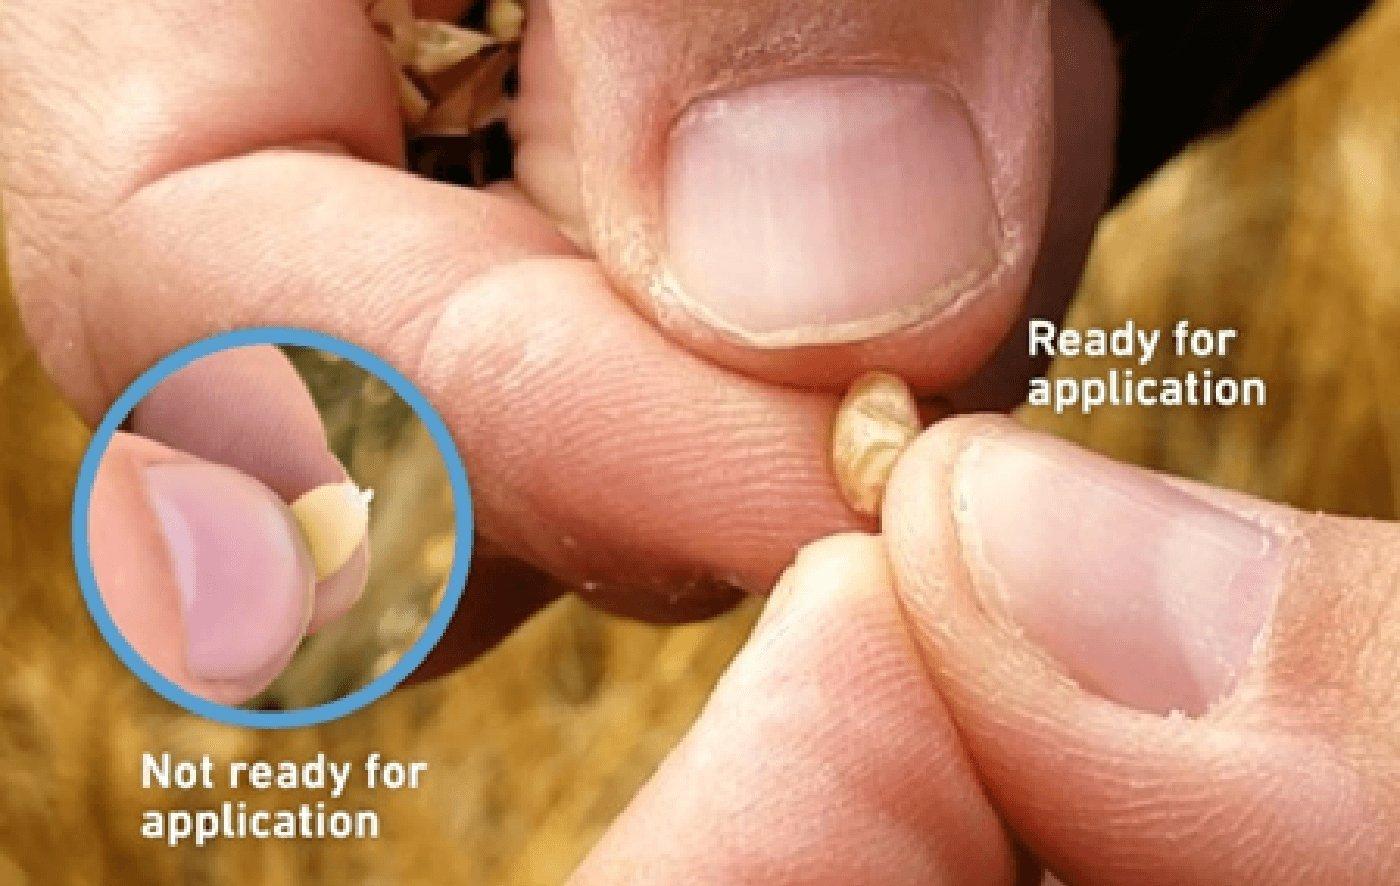
With harvest just around the corner, many are considering whether they need a pre-harvest application, and if so, what that should be. There are many factors to this decision – crop and variety, crop conditions, variable staging and potential weed pressure.

Crop and Variety

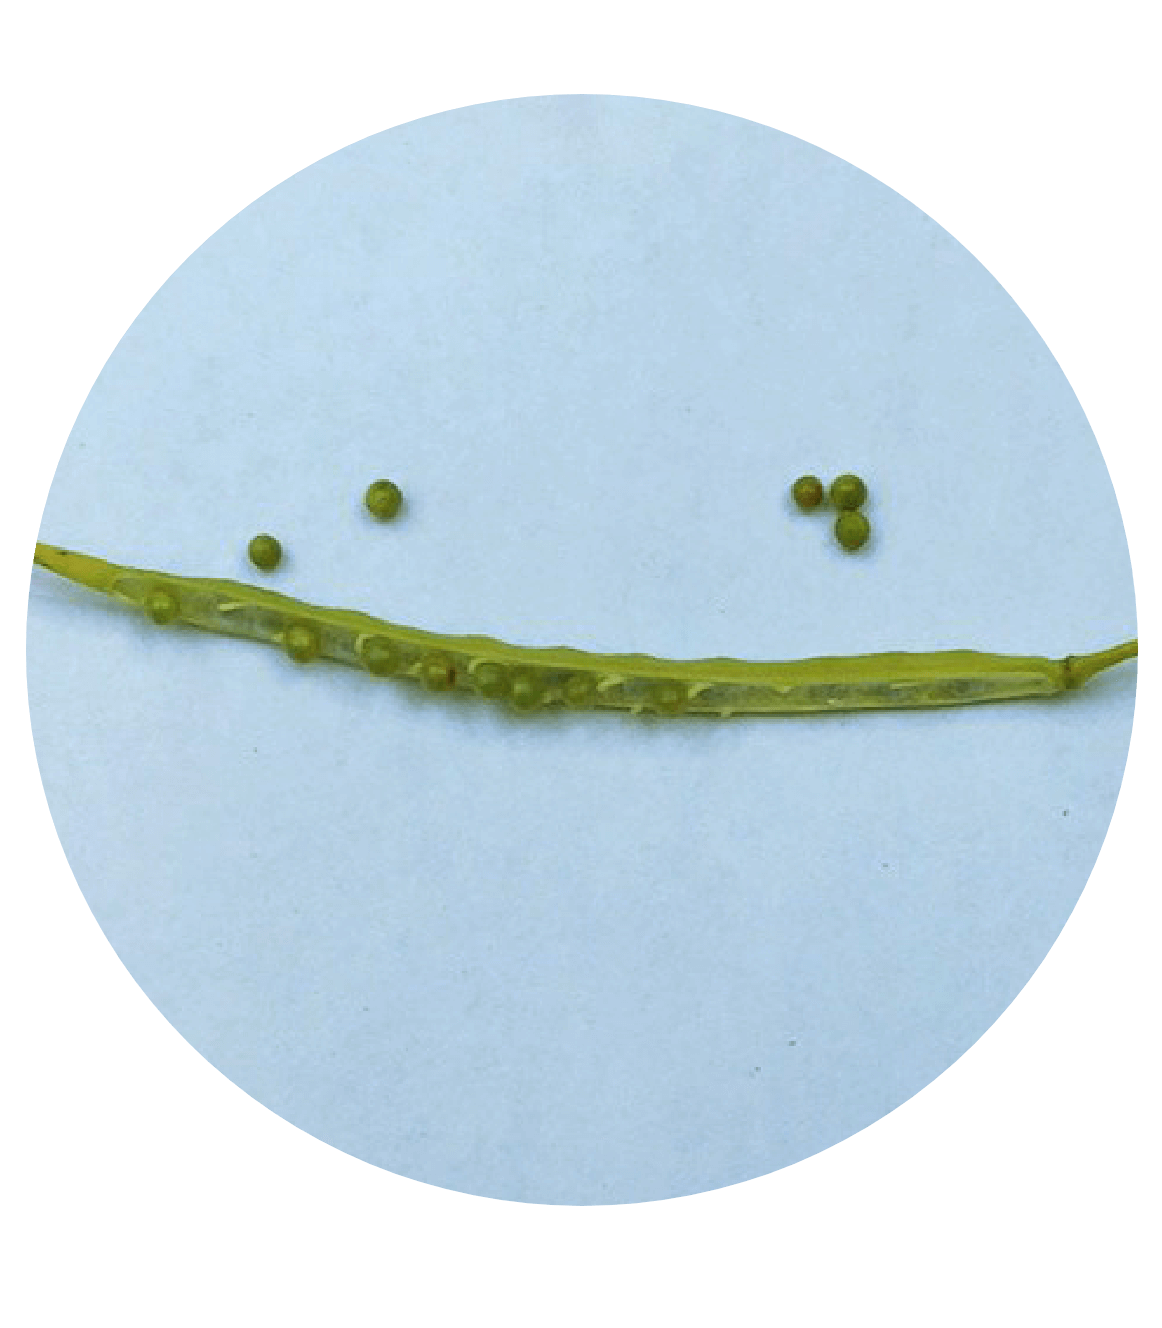
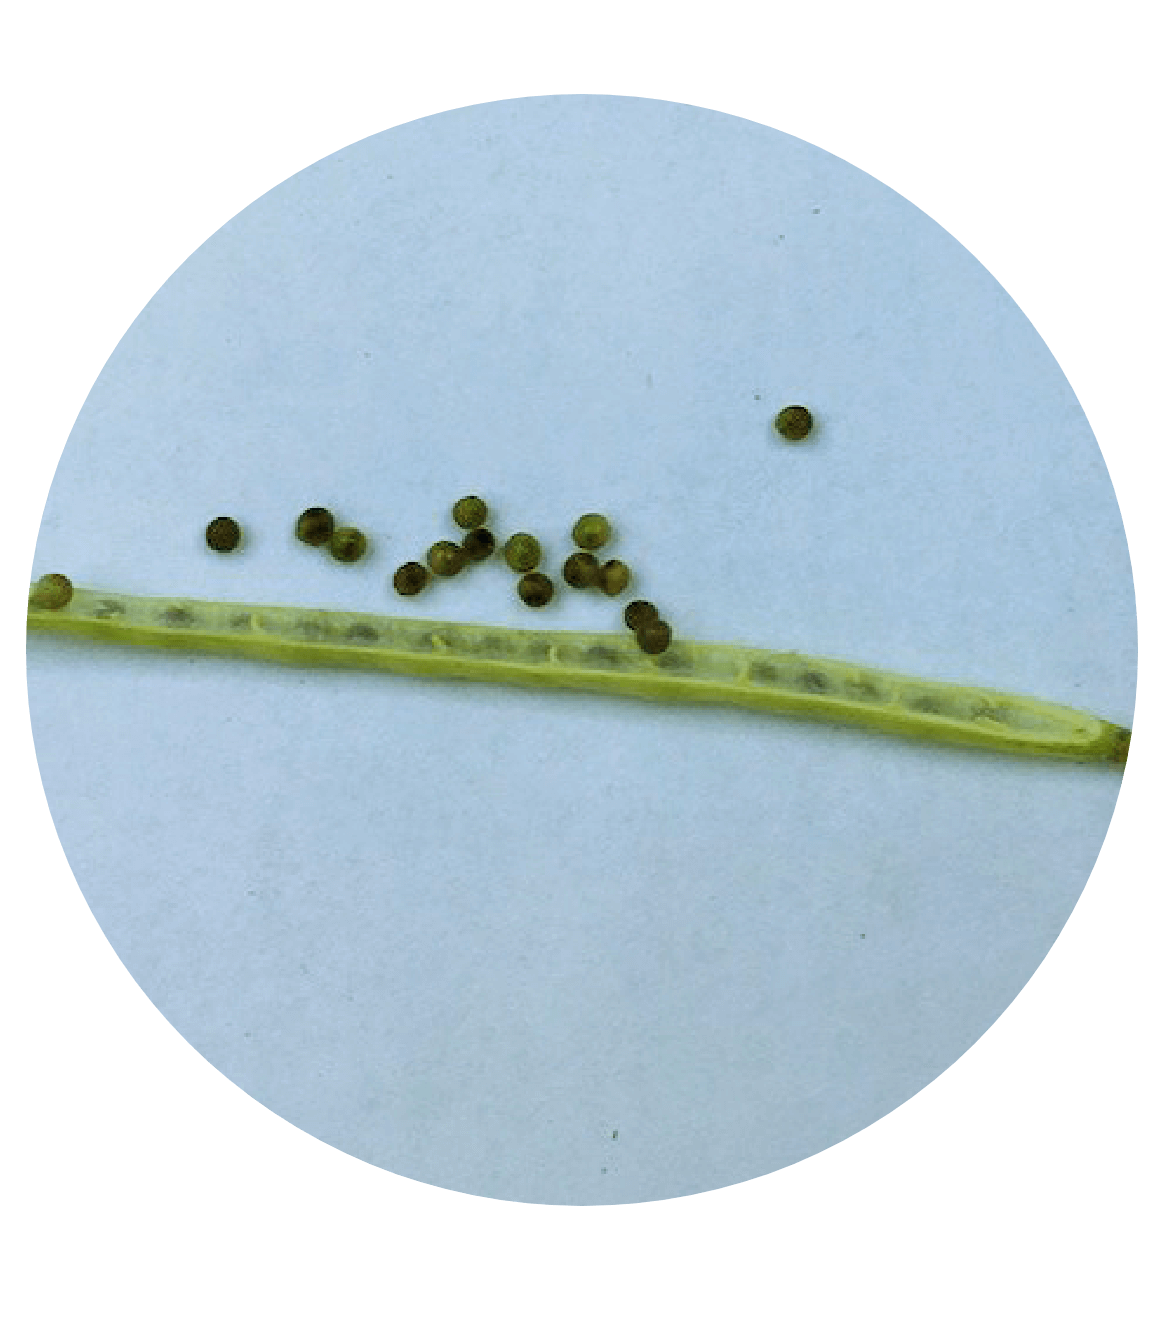
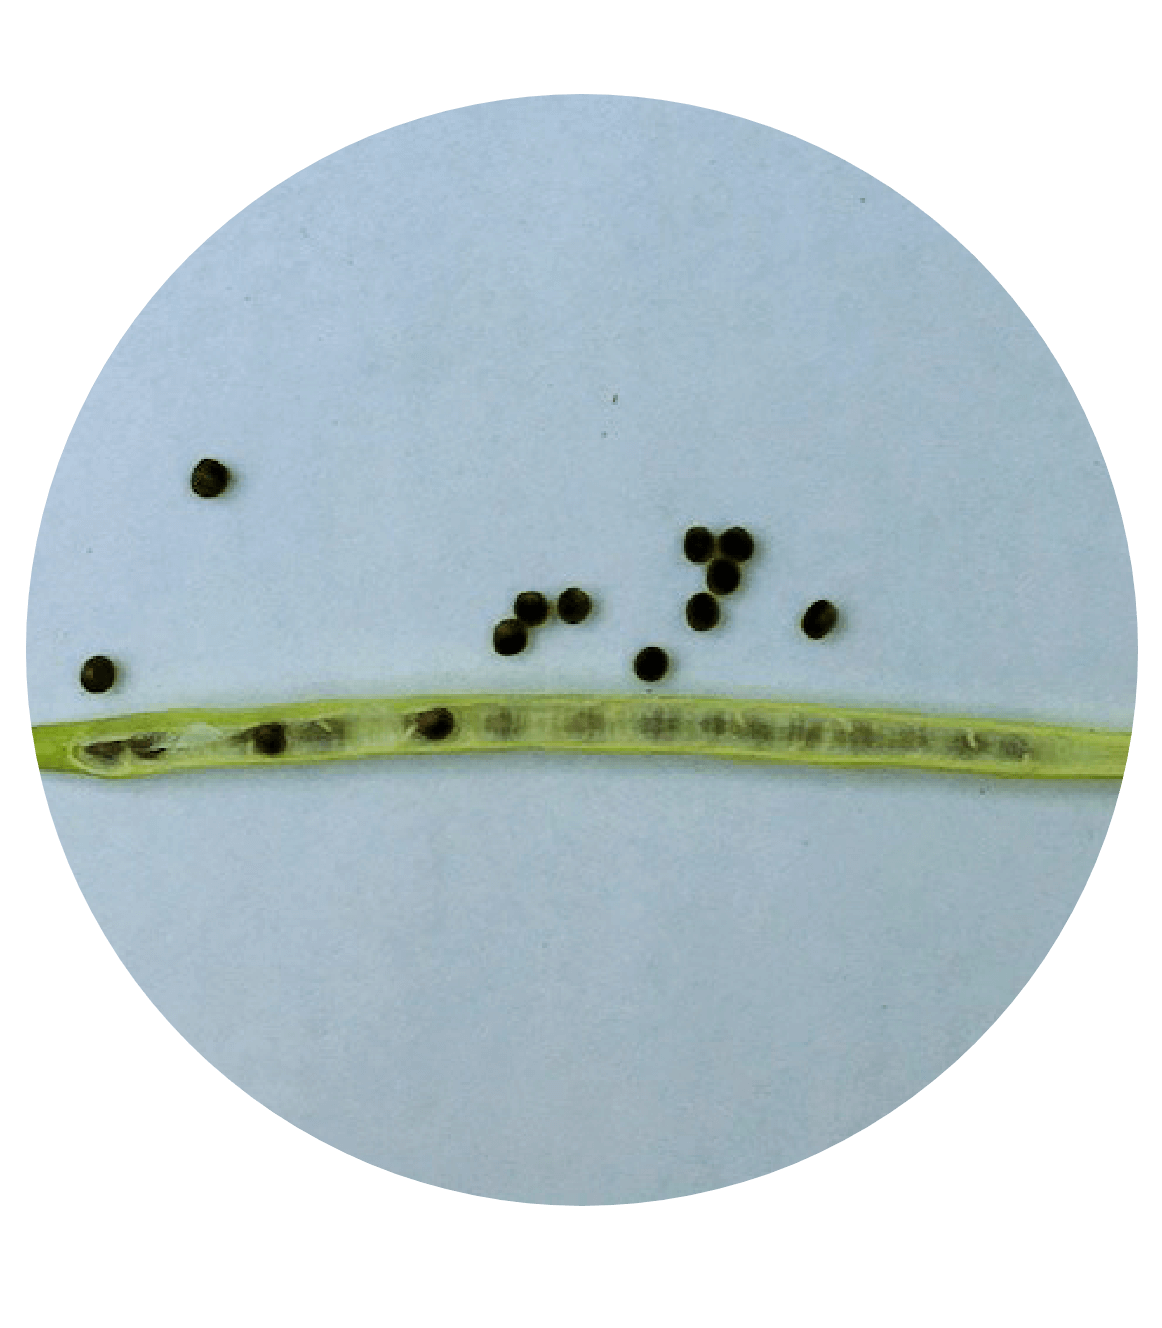
If you are growing a canola hybrid (variety) trait with pod shatter reduction technology, a pre-harvest herbicide or desiccant can help prevent yield loss by reducing the chance of shatter caused by wind damage at this critical time. Further, a pre-harvest application can make straight-cutting easier and smoother by drying down the canola crop.

In pulse crops, the maturity window can vary greatly. To facilitate the maturity process, it can be beneficial to apply either a desiccant or pre-harvest herbicide.

There are two main options available for a pre-harvest application:

  1. Pre-harvest herbicide(s)
  2. Desiccant

Each of these can do a great job of preparing your crop and increasing the efficiency of your harvest, but which one is best for you?

Desiccants are contact herbicides and rapidly kill above-ground vegetation, thereby preparing the crop for harvest. They do not have any contact or systemic activity, which means that if weeds are a problem in your crop, the desiccant will not kill the root system, allowing for potential re-growth of perennial weeds. Desiccants work quickly, so the crop needs to be mature and ready to come off the field.

Pre-harvest herbicides, on the other hand work through translocation with contact and systemic activity. This means the application will kill the weeds and prevent the regrowth of perennial weeds and reduce the amount of green weed material in the crop. A pre-harvest herbicide works slower than a desiccant, so if the crop is showing uneven stand or maturity, the herbicide will speed up the time to maturity without drying the crop down immediately.

If you are growing a canola crop with pod-shatter technology or a pulse crop, you should probably be considering a desiccant or pre-harvest herbicide. If your stand and maturity are looking pretty even, and you don't have a perennial weed problem, a desiccant may be the best option for your crop. If, however, your stand and maturity are looking uneven or perennial weeds are problematic in your field, you best option will be a pre-harvest herbicide application.

Harvest Decision Tree

Calibrate Field Sprayer

Even new or nearly-new field sprayers equipped with what appears to be a good set of nozzles can produce disappointing results if just a bit of dirt, sand or some other defect in the equipment goes undetected. Taking a few minutes to properly calibrate the sprayer can provide peace of mind that crop protection products are at least being applied properly.

Here are a few simple steps to follow to properly calibrate the sprayer requiring a few basic tools: a timer (a watch or smart phone) showing seconds, a measuring tape and a jar graduated in millimetres or ounces.

  1. Measure distance and time
    • Place two stakes 50 metres apart in the field
    • Select the gear and throttle setting (r.p.m.) at which you plan to spray
    • Fill the sprayer half full of water
    • Drive the distance between the stakes three times, timing each pass. Each time, make sure the tractor is at the desired speed as you pass the first stake. Keep driving at this speed until you pass the second stake.
    • Take the average time of the three passes
  2. Measure the average nozzle output
    • Park the sprayer and run at the same pressure as the test run.
    • Collect the output from each nozzle for the average length of time needed to travel the 50 metres in the test run.
    • If any nozzle is more than five per cent above or below the average output, it should be cleaned or replaced
  3. Measure the nozzle spacing in metres
  4. Use the following formula to determine the sprayer output:

    Sprayer Output (L/ha) = (Average Nozzle output (mL) / Nozzle spacing (m)) x 0.2

  5. Farmers who prefer to measure in litres/acre or gallons/acre, can use the following conversion guide:
    • Litres per hectare x 0.4 = Litres per acre
    • Litres per hectare x 0.09 = Imperial gallons per acre
    • Litres per hectare x 0.11 = U.S. gallons per acre

Clean, Crop-Safe Sprayer

When using different herbicides on different crops reduce the risk of applying herbicide residue on a susceptible crop with a proper cleaning of the sprayer between each product.

Here are a few simple steps to follow:

  • Spray crops immediately after filling the sprayer and spray until the tank is empty. Don't leave herbicide residue sitting in the bottom of the tank.
  • Look for solid herbicide residue.
  • Apply direct pressurized spray to all parts of the tank wall.
  • Empty the sump as completely as possible by spraying it out. Repeat the step, each time draining the sump as much as possible.
  • Pump clean water through the boom. Open and close all valves, repeat the process.
  • Many small washes are better than one big one.
  • Clean filters and screens. Nozzle screens and in-line filters can be a reservoir for undiluted or undissolved herbicide and often get overlooked.
  • Clean all nozzle bodies. As you rinse the boom, rotate through all nozzles in a multiple head system. Remove screens.
  • Consider tank cleaning additives. Appropriate cleaning agents are listed on herbicide product labels.
  • Safely dispose rinsate. Whenever possible spray out the tank in the field.

Environmental & Personal Safety

Regardless of product being used, be a good environmental steward and pay attention to leaving recommended buffer zones between sensitive environmental areas such as water bodies and riparian areas. If the recommendation calls for a 30 meter buffer zone, leave 35 metres just to be on the safe side.

At all times be alert to nearby susceptible crops and don't spray under windy conditions.

Spraying is not a spectator sport. Don't spray near yards where people are present. And adopt a good-neighbour policy of letting neighbouring farmers and households know when you plan to be spraying in their area.

And pay attention to your own personal safety. Always wear recommended gear when working with chemicals. And when finished, keep any contaminated clothing away from other household laundry and wash immediately. Some farm operations keep a separate washer and dryer in the shop or garage just for cleaning work clothes.

Top 10 Resistance Weed Management Practices

  1. Ensure crop diversity is the foundation of your HRWM plan

    The core of an effective HRWM plan is crop diversity. Include weed-competitive species and those with varied growth cycles and maturities in your crop plan – a mix of dicots and monocots, winter and spring planted, cool and warm season or annuals and perennials. While this approach ensures herbicide diversity, it also helps to provide different seeding and harvesting dates, and selection pressures on weed communitie

  2. Focus on crops and practices that promote competitiveness

    Employ crops and practices that can aggressively compete with weeds. Some traits include rapid emergence (the 'first up wins') and ground cover, rapid and extensive canopy closure, and plant height. Crop competitiveness is optimized by good agronomic practices such as precision fertilizer placement near or at time of seeding, optimum seed placement and seedbed conditions, and high crop seeding rate. Adopt the 'First up wins' approach.

  3. Scout fields before and after herbicide applications

    Scout your fields before in-crop herbicide application to determine what weeds are present, their distribution and abundance in order to customize an effective weed management plan. Additionally, scouting postherbicide application will inform you of how successful you have been in controlling the targeted weeds. Unmanned aerial vehicles have good potential for weed surveillance and monitoring. Whether using spreadsheet or mapping software, scouting data are important parameters to record annually.

  4. Use herbicide mixtures

    Herbicide mixtures, or tank mixes, can be effective in delaying resistance. They are most successful when herbicide mixtures that combine different sites of action meet the criteria of 1) similar efficacy, 2) similar soil residual activity, and 3) different propensities for selecting for resistance in the target species. For example, mixtures of Group 2 and 4 herbicides having overlapping control of some key broadleaf weeds have been shown to delay or manage resistance.

  5. Rotate herbicide groups

    Rotate herbicides based on their group (site of action). The group number is identified on the front of each herbicide product. Where possible, across and within growing seasons, rotate the use of one herbicide group with other herbicide group(s) that control the same weeds in a field.

  6. Rotate in-crop wheatand non-wheat herbicides

    Many HR grassy weed populations (e.g., wild oats) are able to tolerate herbicides using the same mechanism as wheat. Therefore, it is important to rotate in-crop wheat and non-wheat herbicides to delay or manage this type of resistance. Avoiding continuous cereal crop rotations and including nonselective herbicides such as glyphosate or glufosinate in HR crops will help to achieve this objective.

  7. Use weed sanitation practices

    Equipment sanitation practices reduce both immigration of weed seeds and spores into a field and HR gene (seed or pollen) dispersal across a field. Reducing weed seed load into the soil can be achieved directly by harvest weed seed control practices, which include chaff carts, direct-harvest crop residue baling, narrow-windrow burning and seed pulverization.

  8. Customize weed management by field

    Weed management programs are not one size fits all – they should be customized on a field-by-field basis as weed populations are not uniform across your land. Even within a typical field they are not generally consistent. Survey your weed populations before herbicide application. It is also possible to detect and manage weeds in real time using sprayers equipped with sensors.

  9. Practice strategic tillage

    Use tillage only if, where and when deemed necessary to manage herbicide-resistant (HR) weeds. The risk of weeds developing resistance to herbicides is shown to be highest in no-tillage, owing to greater herbicide use and weed seed bank turnover rate. In some regions, tillage is an essential method for managing some glyphosate-resistant weeds.

  10. Keep accurate records

    Maintain a database that chronicles your agronomic practices, particularly those that vary from field to field and year to year. Records should include cultural, mechanical, and herbicidal weed management variables. Keeping accurate records will help you make informed crop management decisions, especially pesticide choices, for each field.

This story is adapted from: "Our top 10 herbicide-resistant weed management practices" by Hugh Beckie and Neil Harker in Pest Management Science, Volume 73, June 2017.

Distributed by

Western Grains